





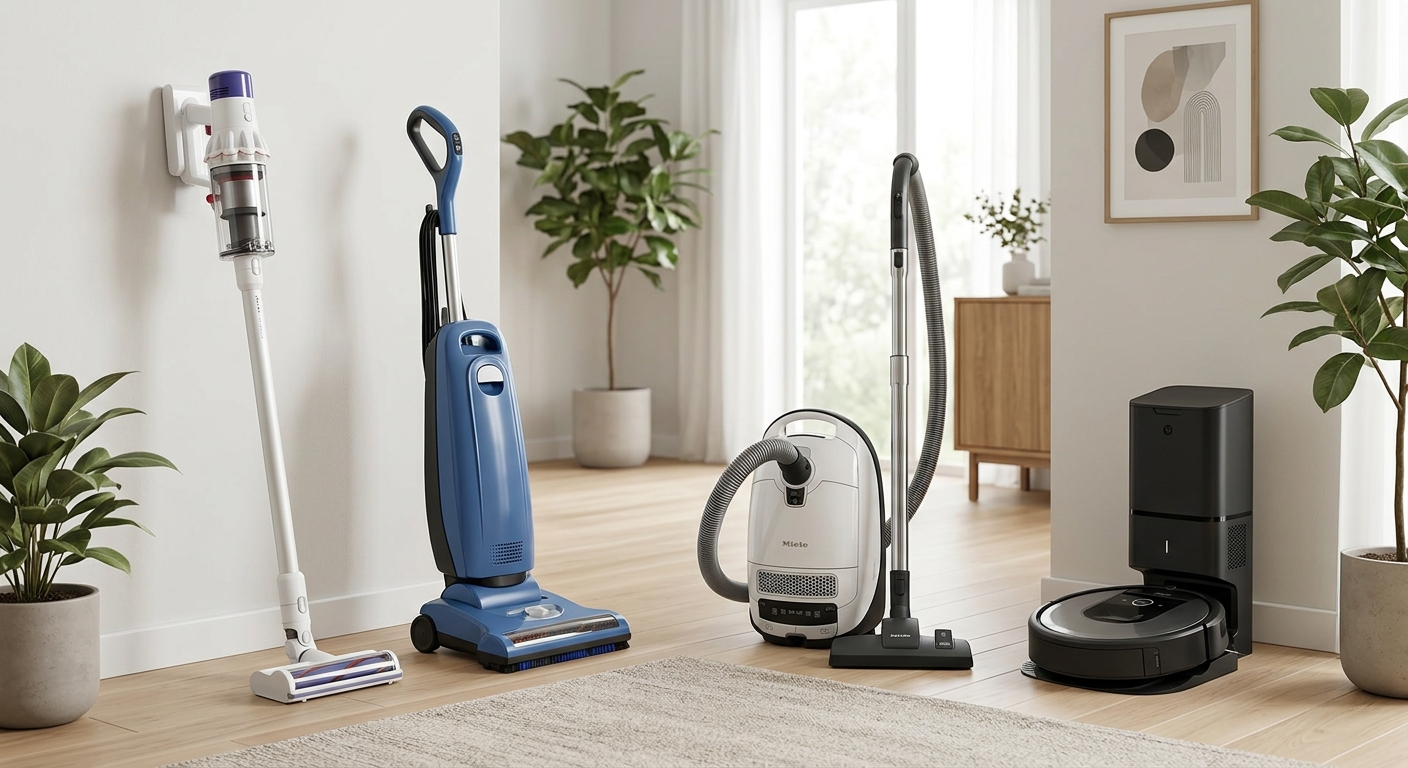
A vacuum cleaner is one of those household tools you don’t think about — until it stops working the way it should. Weak suction, strange smells, a machine that won’t turn on at all — these problems are more common than most people realize, and the good news is that the vast majority of them can be fixed at home without calling a technician or buying a replacement.
This guide walks through the most frequent vacuum cleaner issues, why they happen, and exactly how to solve them — whether you’re using an upright, canister, stick, or robot vacuum.
Table of Contents
- Why Your Vacuum Has Lost Suction
- Vacuum Won’t Turn On At All
- Vacuum Turns On But the Brush Roll Won’t Spin
- Strange Burning Smell From Your Vacuum
- Vacuum Is Leaving Streaks or Not Picking Up Debris
- Vacuum Keeps Overheating and Shutting Off
- Vacuum Making Loud or Unusual Noises
- Vacuum Cord Won’t Retract
- Bag or Bin Fills Up Too Quickly
- Vacuum Smells Bad Even When Clean
- Robot Vacuum Won’t Dock or Charge
- Vacuum Is Leaving Marks on Floors or Carpets
- Filter Problems and How Often to Replace Them
- When It’s Time to Repair vs. Replace Your Vacuum
- Preventive Maintenance Checklist to Avoid Future Problems
1. Why Your Vacuum Has Lost Suction
This is, by far, the number one complaint vacuum owners have. You turn the machine on, run it over the carpet, and notice it’s barely lifting dirt anymore. There are usually four culprits behind this.
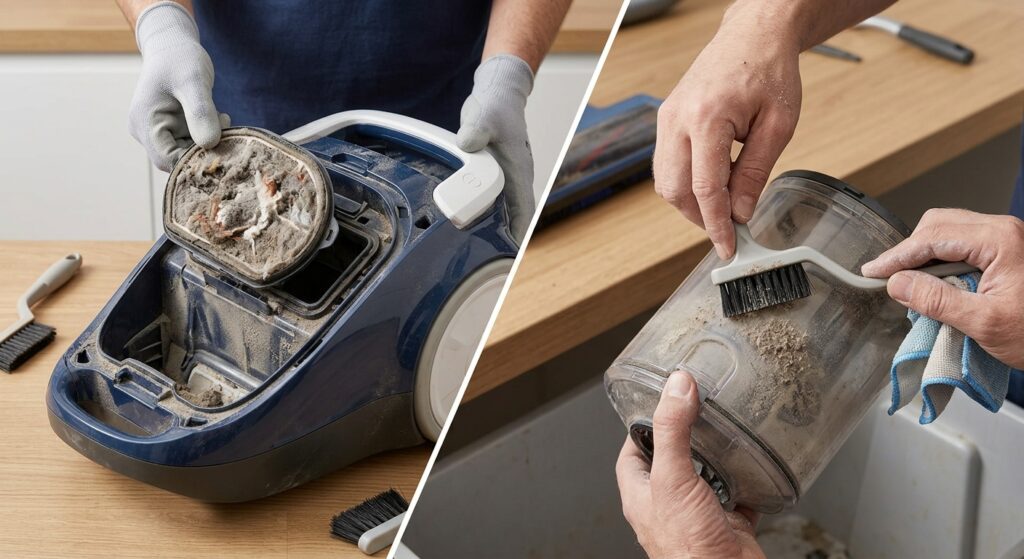
A full or clogged bag/bin. Bagged vacuums typically need to be changed once they’re about two-thirds full — not completely full — because airflow drops sharply before the bag looks “full.” Bagless vacuums need their bins emptied more often than most people think, ideally after every one or two uses for high-traffic homes.
A clogged filter. Vacuum filters trap fine dust and allergens, and over time they become so packed with particles that air simply can’t pass through. A blocked filter can cut suction power by more than half.
A blockage somewhere in the airflow path. This includes the hose, the base of the vacuum head, or the point where the hose connects to the main body. Hair, string, and small objects (coins, toys, hair ties) are common causes.
Worn or damaged seals. Rubber gaskets and seals around the bin or hose connections degrade over time, letting air leak out instead of pulling through the nozzle.
How to fix it:
- Empty the bin or replace the bag immediately, even if it doesn’t look completely full.
- Wash or replace the filter according to the manufacturer’s schedule (more on this in section 13).
- Detach the hose and shine a flashlight through it, or use a broom handle to gently push out any blockage.
- Check the underside of the vacuum head for wrapped hair and cut it away with scissors.
- Inspect rubber seals for cracks; many are inexpensive to replace individually.
2. Vacuum Won’t Turn On At All
Before assuming the motor has failed, rule out the simple explanations first — they solve this problem more often than people expect.
- Check the outlet. Plug another device into the same socket to confirm it’s receiving power.
- Inspect the power cord for cuts, fraying, or a loose connection at the plug.
- Check the on/off switch — on some models, a stuck or worn switch can prevent power from reaching the motor.
- Look for a thermal reset button. Many vacuums have a built-in thermal cutoff that trips if the motor overheats. It’s usually a small red or orange button near the base or handle. Let the machine cool for 30–45 minutes, then press the reset button.
- Check the fuse. Some vacuums (especially older or higher-end models) have an internal fuse that can blow. This typically requires opening the housing, so check your manual first.
If none of these resolve it, the motor itself may have failed, which usually calls for professional repair or replacement, depending on the vacuum’s age and value.
3. Vacuum Turns On But the Brush Roll Won’t Spin
The brush roll (the rotating bar with bristles under the vacuum head) is what actually agitates carpet fibers to lift embedded dirt. If it stops spinning, your vacuum will still make noise and pull some air, but it won’t clean carpets effectively.
Common causes:
- A broken or slipped drive belt — the most frequent cause by far
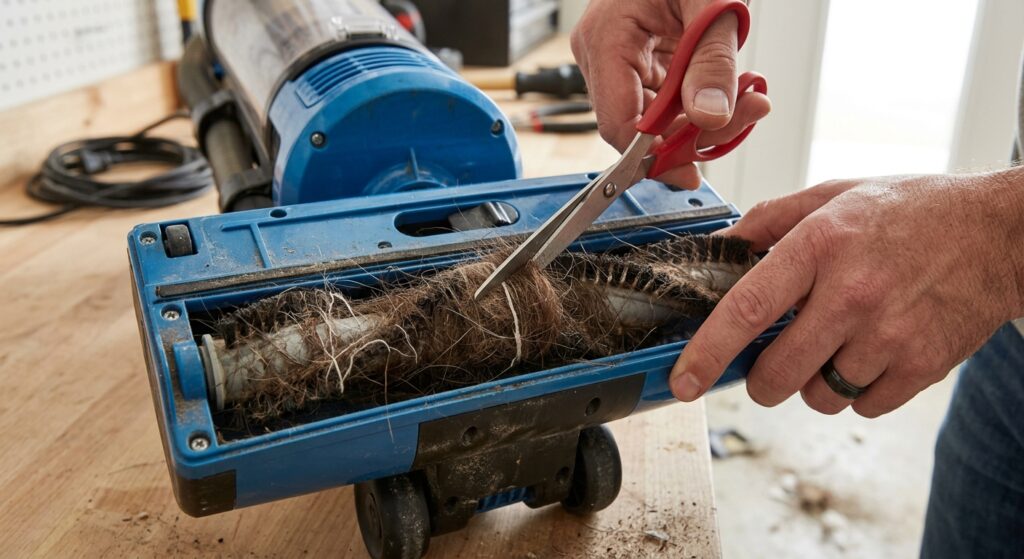
- Hair and thread wrapped tightly around the brush roll, jamming it
- A worn-out brush roll motor (on vacuums with a separate motor for the brush)
- Debris stuck in the brush roll’s bearings
How to fix it:
- Unplug the vacuum before doing anything.
- Remove the base plate (usually held by a few screws) to access the brush roll.
- Cut away any wrapped hair or thread with scissors — a seam ripper works well for tight, packed hair.
- Check the belt for cracks, stretching, or snapping. Belts are cheap and widely available by model number; replacing one is usually a 10-minute job.
- Reassemble and test.
4. Strange Burning Smell From Your Vacuum
A burning smell is your vacuum’s way of telling you something is under strain. It should never be ignored, as continued use can damage the motor permanently or, in rare cases, pose a fire risk.
Likely causes:
- A clogged filter or full bag forcing the motor to work harder than it should
- A jammed brush roll putting excess load on the belt, which can overheat and give off a rubbery burning smell
- Dust and debris built up around the motor housing
- A failing motor nearing the end of its lifespan
What to do:
- Turn the vacuum off immediately and unplug it.
- Empty the bin, check the filter, and inspect the brush roll for jams.
- Let the vacuum cool completely before running it again.
- If the smell persists after these checks, stop using the vacuum and have the motor inspected — a burning motor smell that doesn’t resolve is a sign of internal failure.
5. Vacuum Is Leaving Streaks or Not Picking Up Debris
If your vacuum runs fine but leaves visible dirt, crumbs, or streak marks behind, the issue is usually mechanical rather than motor-related.
- Check the height adjustment setting. Most uprights have a dial to adjust for carpet pile thickness. If it’s set too high for the flooring, the brush roll won’t make proper contact.
- Inspect the brush roll bristles. Worn-down or flattened bristles lose their ability to agitate and lift dirt.
- Check for a torn or missing brush strip. Some brush rolls have a felt or rubber strip alongside the bristles specifically to catch fine debris and hair — if it’s torn off, larger particles get missed.
- Look at the front wheels. If they’re wobbly or the vacuum doesn’t sit flush against the floor, suction at the nozzle drops.
6. Vacuum Keeps Overheating and Shutting Off
This is closely related to the thermal reset issue mentioned earlier, but if it’s happening repeatedly, there’s an underlying cause that needs addressing rather than just resetting the switch each time.
Common reasons:
- Restricted airflow from a full bag/bin, clogged filter, or blocked hose (the motor works harder to compensate, generating excess heat)
- A jammed brush roll adding resistance
- Blocked motor vents covered in dust, preventing heat from escaping
- Running the vacuum continuously for long stretches without breaks, especially in older machines
Fix: Work through the suction troubleshooting steps in section 1, clean any visible vents on the motor housing with a soft brush, and give the vacuum short breaks during long cleaning sessions. If overheating continues even with a clear airflow path, the motor may be nearing failure.
7. Vacuum Making Loud or Unusual Noises
Vacuums aren’t silent, but a new rattling, squealing, grinding, or high-pitched whine usually signals a specific problem.
| Sound | Likely Cause |
|---|---|
| High-pitched whine or screech | Worn or slipping belt |
| Rattling | Small object stuck in the hose or brush roll |
| Grinding | Bearing wear in the brush roll or motor |
| Loud roaring with no change in pitch | Clogged filter forcing motor to work harder |
| Clicking | Debris caught between the brush roll and housing |
Isolating where the sound is coming from — the motor housing versus the brush roll area — narrows down the cause quickly. Most noise issues trace back to a belt or a foreign object.
8. Vacuum Cord Won’t Retract
For vacuums with an automatic cord rewind feature, a cord that won’t retract (or retracts unevenly, in jerky pulls) is usually caused by:
- A tangled or kinked cord inside the housing
- A weakened retraction spring
- Dust and debris built up in the cord reel mechanism
Fix: Fully extend the cord, then feed it back in slowly and evenly by hand while holding the retract button, rather than letting it snap back on its own — this often resolves kinking issues. If the spring itself has lost tension, it typically needs professional replacement, as the reel mechanism is enclosed and not easily user-serviceable on most models.
9. Bag or Bin Fills Up Too Quickly
If you find yourself emptying the bin or replacing bags far more often than seems reasonable, it’s rarely a sign anything is wrong — but it can also point to an issue worth checking.
- Confirm the bag/bin size is appropriate for your home’s size and flooring type (homes with pets or heavy carpet usage fill bins faster, which is normal)
- Check that the bag is a genuine, correctly sized replacement — generic bags that don’t seal properly can let debris escape into the motor area instead of staying contained
- If a bagless bin fills unusually fast with fine dust specifically, check whether the filter is seated correctly; a poorly seated filter lets dust pass straight into the bin without being separated properly, which can look like faster filling but is actually a filtration issue
10. Vacuum Smells Bad Even When Clean
A musty or unpleasant smell that lingers even after emptying the bin usually comes from trapped moisture or debris buildup somewhere air-tight solutions don’t reach easily.

- Wash the filter (if it’s a washable type) with water only — no soap — and let it air dry completely for 24–48 hours before reinserting. A damp filter is a common cause of mildew smell.
- Clean the bin or bag compartment with a damp cloth and let it dry fully.
- Check the brush roll for damp hair or organic debris (food crumbs, pet hair) that has started to decompose.
- Add a few drops of essential oil to a cotton ball and place it in the bag or bin as a simple ongoing freshener — a common trick, though it treats the symptom rather than the cause.
11. Robot Vacuum Won’t Dock or Charge
Robot vacuums come with their own set of common issues, separate from traditional models.
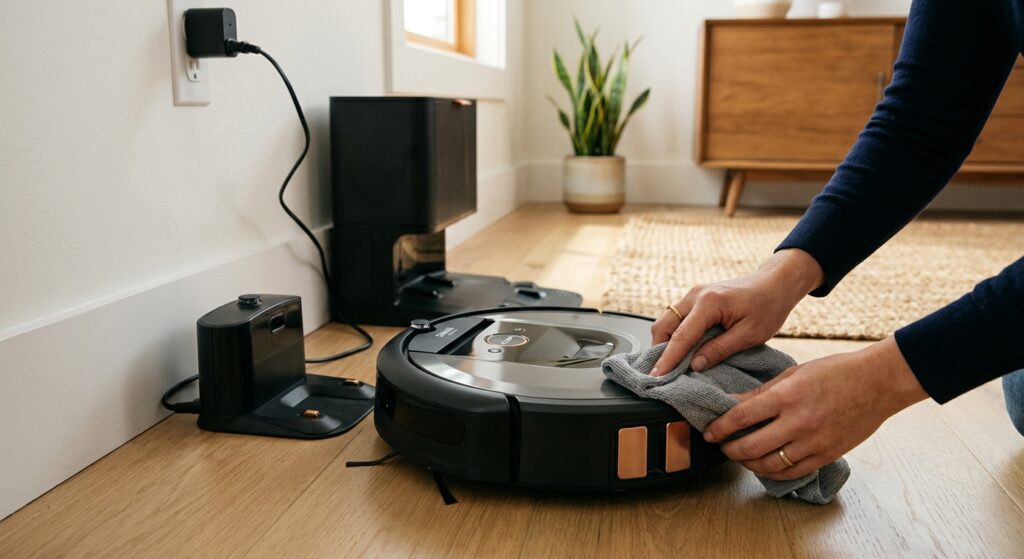
- Dirty charging contacts. Both the charging pins on the robot and on the dock itself accumulate dust, which blocks the electrical connection. Wipe both with a dry cloth regularly.
- Dock placement. The dock needs clear space around it (manufacturers typically recommend at least half a meter on either side and in front) and should be against a wall, not in an open area, so the robot can navigate to it reliably.
- Battery degradation. Like any rechargeable battery, robot vacuum batteries lose capacity over time. If the robot charges but dies quickly during cleaning, the battery may need replacing — most robot vacuum batteries last 2–3 years with regular use.
- Sensor obstruction. Dirty or blocked navigation sensors can prevent the robot from finding its way back to the dock at all. Wipe down the sensor strip on the front and top of the unit.
12. Vacuum Is Leaving Marks on Floors or Carpets
- Wheel marks on hard floors are often caused by dirty wheels picking up debris and dragging it — clean the wheels with a damp cloth.
- Carpet “trails” or lines after vacuuming are typically normal and caused by the direction of the pile fibers, not a malfunction.
- Actual scuff marks usually come from wheel material reacting with certain floor finishes; check whether your model has a “hard floor” attachment or setting that lifts the brush roll to avoid direct contact.
13. Filter Problems and How Often to Replace Them
Filters are the most overlooked part of vacuum maintenance, and neglecting them is responsible for a huge share of the “lost suction” and “burning smell” complaints covered above.
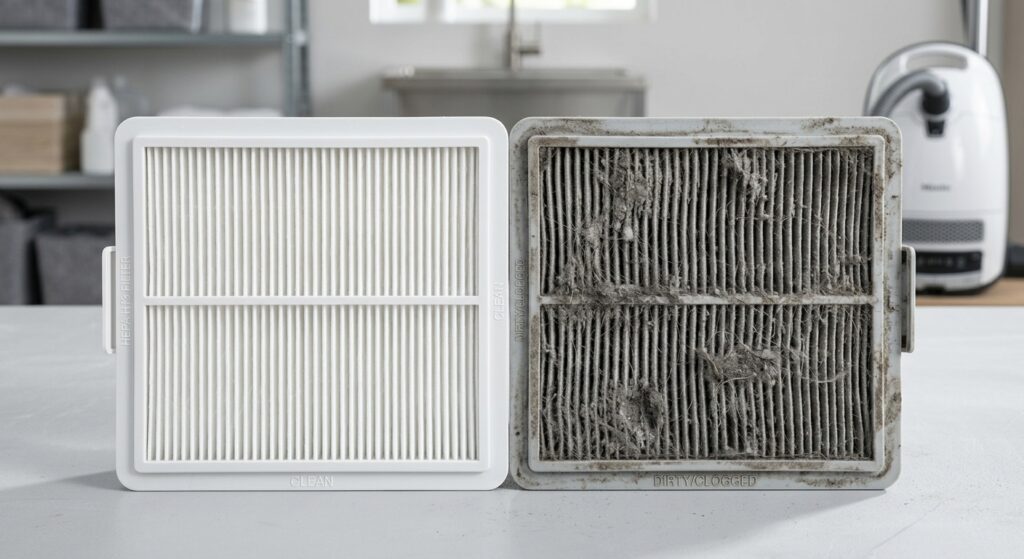
General filter maintenance guidelines:
- Foam filters: Rinse with water every 1–2 weeks of regular use; replace every 6–12 months.
- HEPA filters (washable): Rinse monthly; replace every 6–12 months even if washable, since filtering capacity degrades with age.
- HEPA filters (non-washable): Replace every 3–6 months; check your specific model’s manual, as washing a non-washable filter can damage it.
- Pre-motor and post-motor filters: Many vacuums have two separate filters — one before the motor (catches larger debris) and one after (catches fine dust before exhaust air leaves the machine). Both need attention; people often only remember one.
Always let filters dry completely — a minimum of 24 hours — before reinserting them. Running a vacuum with a damp filter can damage the motor and encourages mold growth inside the machine.
14. When It’s Time to Repair vs. Replace Your Vacuum
Not every problem is worth fixing, and knowing when to stop repairing and start shopping saves both money and frustration.
Repair is usually worth it when:
- The vacuum is under 5 years old and otherwise in good condition
- The problem is a belt, filter, hose blockage, or a single worn part
- The repair cost is under roughly 30–40% of the price of a comparable replacement
Replacement makes more sense when:
- The motor itself has failed (motor replacement often costs nearly as much as a new vacuum)
- The vacuum is older than 7–8 years and has had multiple repairs already
- Parts are no longer available for the specific model
- Suction and performance have declined steadily despite proper maintenance, suggesting general wear across multiple components rather than one fixable issue
15. Preventive Maintenance Checklist to Avoid Future Problems
A short routine goes a long way toward avoiding most of the problems covered in this guide.
After every use:
- Empty the bin if it’s more than half full
- Check the brush roll quickly for wrapped hair
Monthly:
- Rinse washable filters and let them dry fully
- Wipe down the hose and check for blockages
- Clean wheels and check for debris buildup
Every 3–6 months:
- Replace non-washable filters
- Inspect the belt for wear or stretching
- Deep-clean the brush roll, removing it fully if the design allows
Annually:
- Check all seals and gaskets for cracking
- Inspect the power cord for wear, especially near the plug
- Consider a full motor and housing dust-out using compressed air (with the vacuum unplugged)
Final Thoughts
Most vacuum cleaner problems come down to one of three things: restricted airflow, a worn belt, or a filter that hasn’t been cleaned in too long. Working through the checks in this guide — starting with the simplest explanations before assuming the worst — resolves the overwhelming majority of issues without needing a repair technician or a new purchase.
Keeping up with basic maintenance (emptying the bin regularly, cleaning filters on schedule, and clearing hair from the brush roll) is the single most effective way to prevent these problems from coming up in the first place, and it can meaningfully extend the working life of any vacuum cleaner, regardless of brand or price point.